Knowledge Base
Create a knowledge base to give your agents access to grounded information.
Knowledge Base enables your agents to retrieve accurate, sourced information from your documents. This is essential for RAG (Retrieval-Augmented Generation) workflows.
Note:
Knowledge Base setup is optional. Add it when you need document-grounded responses.
When to Use Knowledge Base
| Use Case | Example |
|---|---|
| Q&A Systems | Answer questions from company documentation |
| Research Assistants | Search across uploaded materials |
| Grounded Responses | Ensure factual accuracy with citations |
| Domain Expertise | Train agents on specialized knowledge |
Navigate to Knowledge Base
- Open the sidebar menu
- Click Knowledge Base to expand
- Select Knowledge Bases
You'll see your existing knowledge bases (if any) and options to create new ones.
 Fig : Knowledge Base landing window
Create a Knowledge Base
The creation process has 3 steps:
- Create Empty Knowledge Base — Configure name, provider, and settings
- Document Upload — Add your files
- Execute & Finish — Process and index documents
Step 1: Configure Knowledge Base
| Field | Description |
|---|---|
| Name | Descriptive name (e.g., "Quarterly Earnings Report") |
| Knowledge Base Provider | Select Amazon Bedrock or Milvus |
| Embedding Model | Model for vector embeddings (e.g., Titan G1 - Text v2.0) |
| Data Source | Where raw files are stored |
| Metadata | Optional key-value pairs for filtering |
Knowledge Base Providers
| Provider | Status | Storage | Vector DB | Best For |
|---|---|---|---|---|
| Amazon Bedrock | Production | Amazon S3 | Bedrock KB | Enterprise, AWS users |
| Milvus | In Development | NFS Storage | Milvus | Self-hosted, custom setups |
Amazon Bedrock Setup
- Select Amazon Bedrock as the provider
- Choose embedding model: Titan G1 - Text v2.0 (recommended)
- Data Source: Amazon S3 (automatically configured)
- Add optional metadata fields for document filtering
- Click Create and Continue
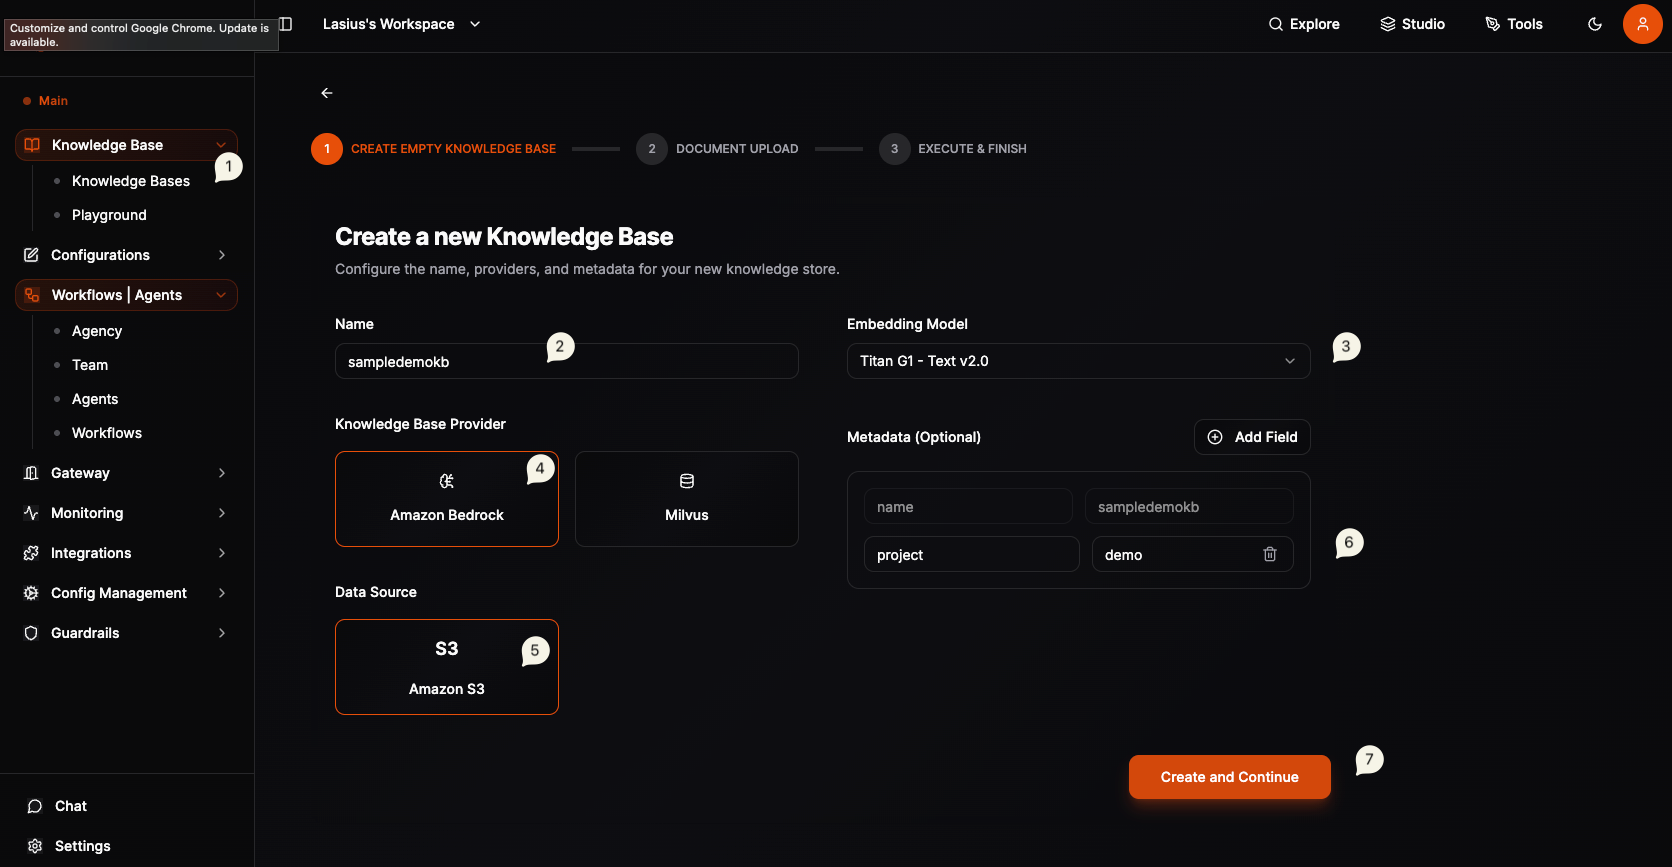 Fig : Knowledge Base create
Note:
Amazon Bedrock Knowledge Base uses S3 to store raw files and Bedrock's managed vector store for embeddings.
Milvus Setup (Coming Soon)
- Select Milvus as the provider
- Configure NFS storage path for raw files
- Milvus connection settings for vector storage
Step 2: Add Files
After creating the knowledge base, you'll see the management view with tabs: Overview, Files, Analytics, Settings.
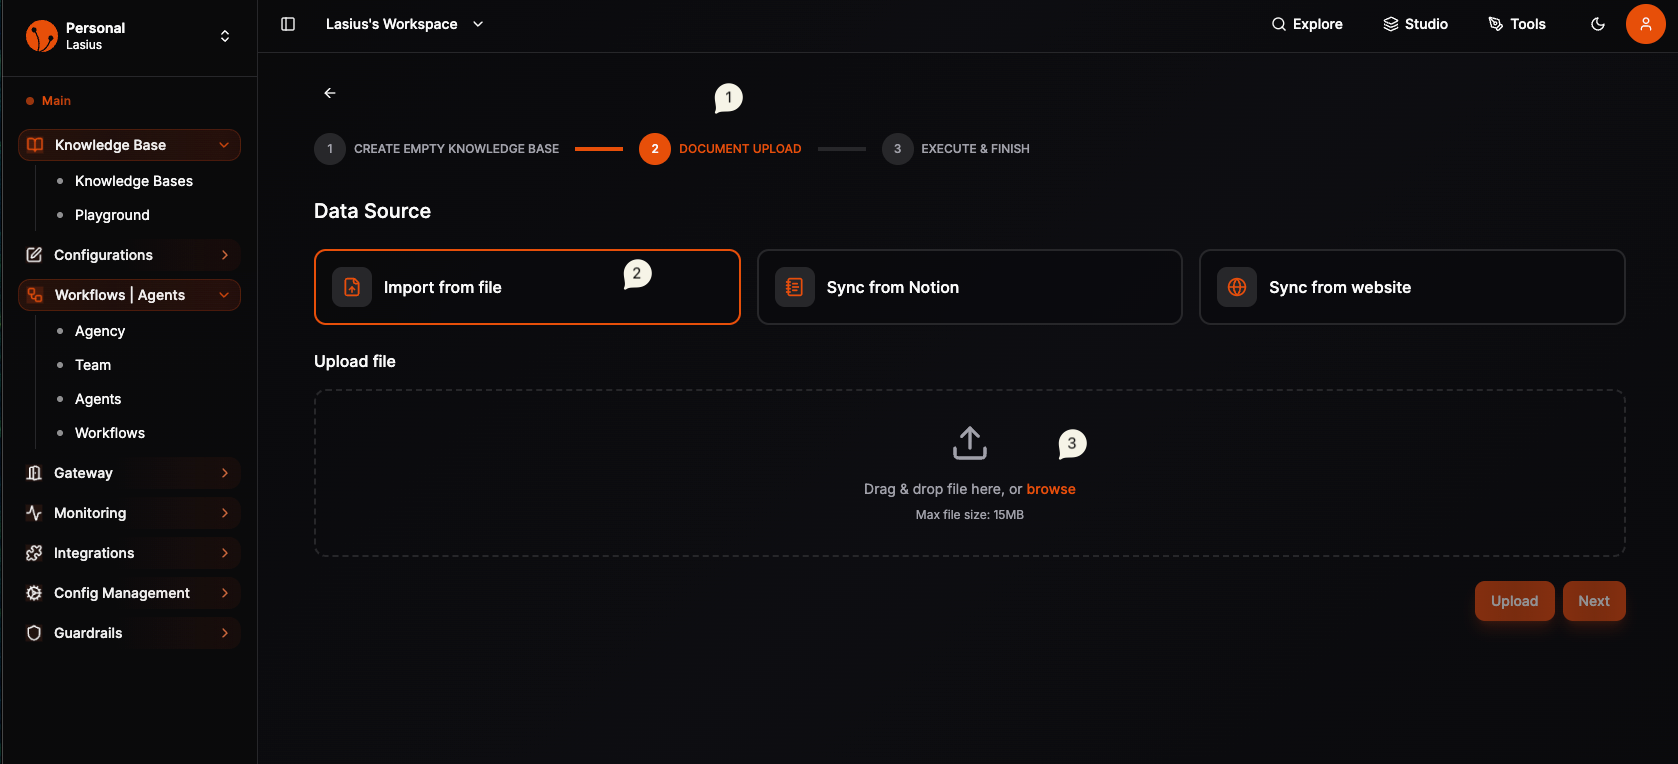 Fig : Knowledge Base with initial files
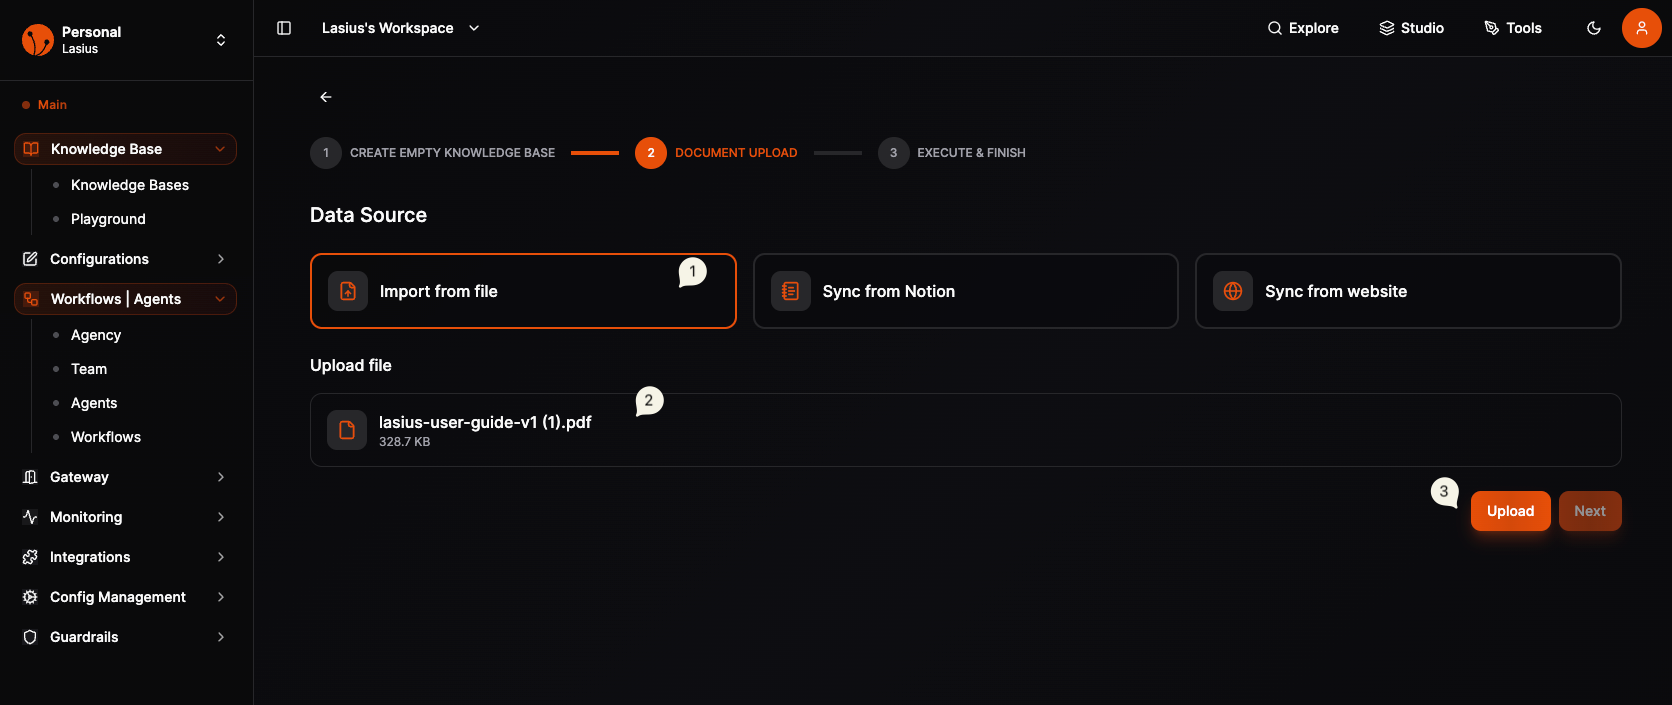 Fig : Knowledge Base Finish Setup
Supported File Types
| Type | Extensions |
|---|---|
| Documents | PDF, DOCX, TXT, MD |
| Data | JSON, CSV, YAML |
Upload Process
- Click Add Files button
- Drag files into the upload area or click to browse
- Files are staged (uploaded but not yet indexed)
Step 3: Sync Knowledge Base
After adding files, you must sync to create vector embeddings:
- Click Sync Knowledge Base button
- Wait for processing to complete
- Use Check Knowledge Base Status to monitor progress
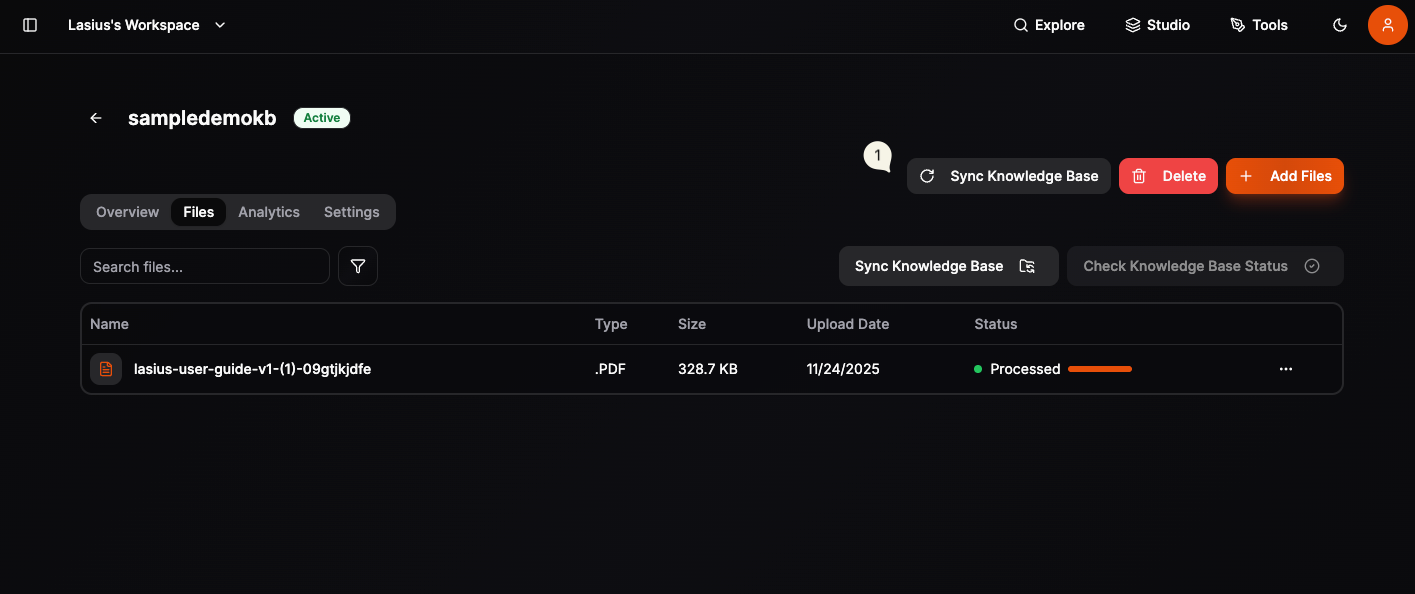 Fig : Knowledge Base Sync for embeddings creation
Note:
Uploaded files are staged first. They won't be searchable until you sync the knowledge base. After sync it will take few minutes to create embeddings.
Document Status
| Status | Meaning |
|---|---|
| Staged | File uploaded, not yet indexed |
| Processing | Creating vector embeddings |
| Processed | File indexed and searchable |
| Failed | Processing error (check format) |
Management Actions
| Action | Description |
|---|---|
| Add Files | Upload new documents |
| Sync Knowledge Base | Process staged files into vectors |
| Check Knowledge Base Status | View sync progress |
| Delete | Remove the knowledge base |
Note:
You can add multiple files before syncing. Sync processes all staged files at once.
Test in Playground
Before connecting to workflows, test your knowledge base:
- Go to Knowledge Base → Playground
- Select your knowledge base
- Enter a test query
- Review retrieved results and relevance
This helps verify your documents are properly indexed.
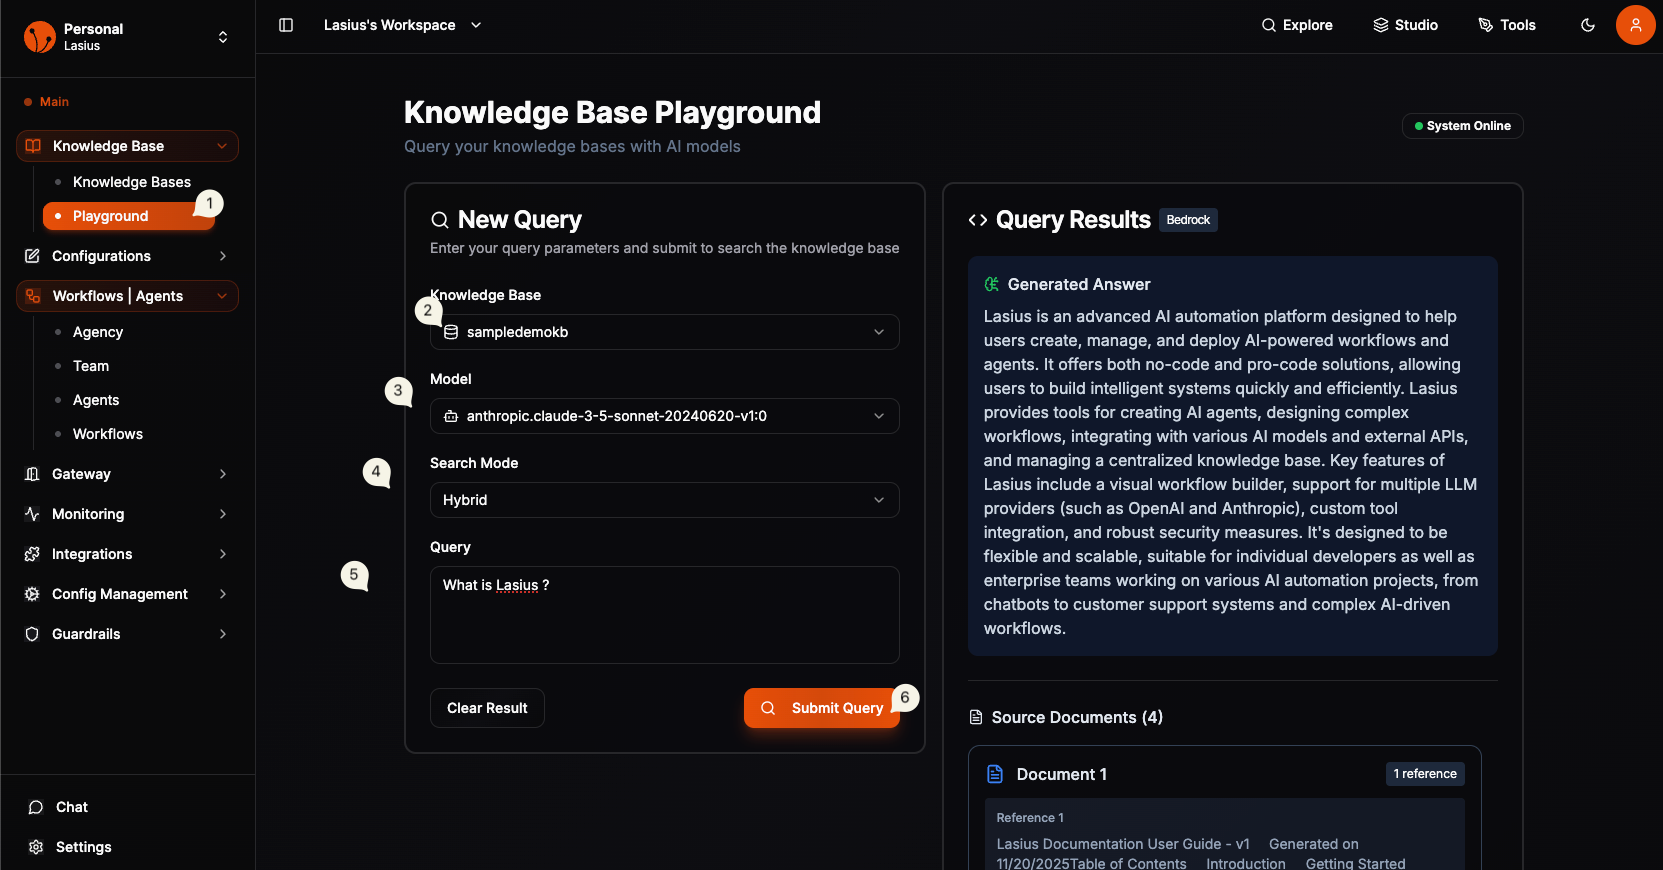 Fig : Knowledge Base Playground
Note:
You must have configured the default model provider from Configurable Component
Connect to Workflow
Add as Agent Tool
- Open your workflow in the Flow Editor
- Select an Agent node
- In the agent's Tools section, add Knowledge Base
- Select your knowledge base from the dropdown
- Configure retrieval settings:
| Setting | Description |
|---|---|
| Top K | Number of results to retrieve |
| Similarity Threshold | Minimum relevance score |
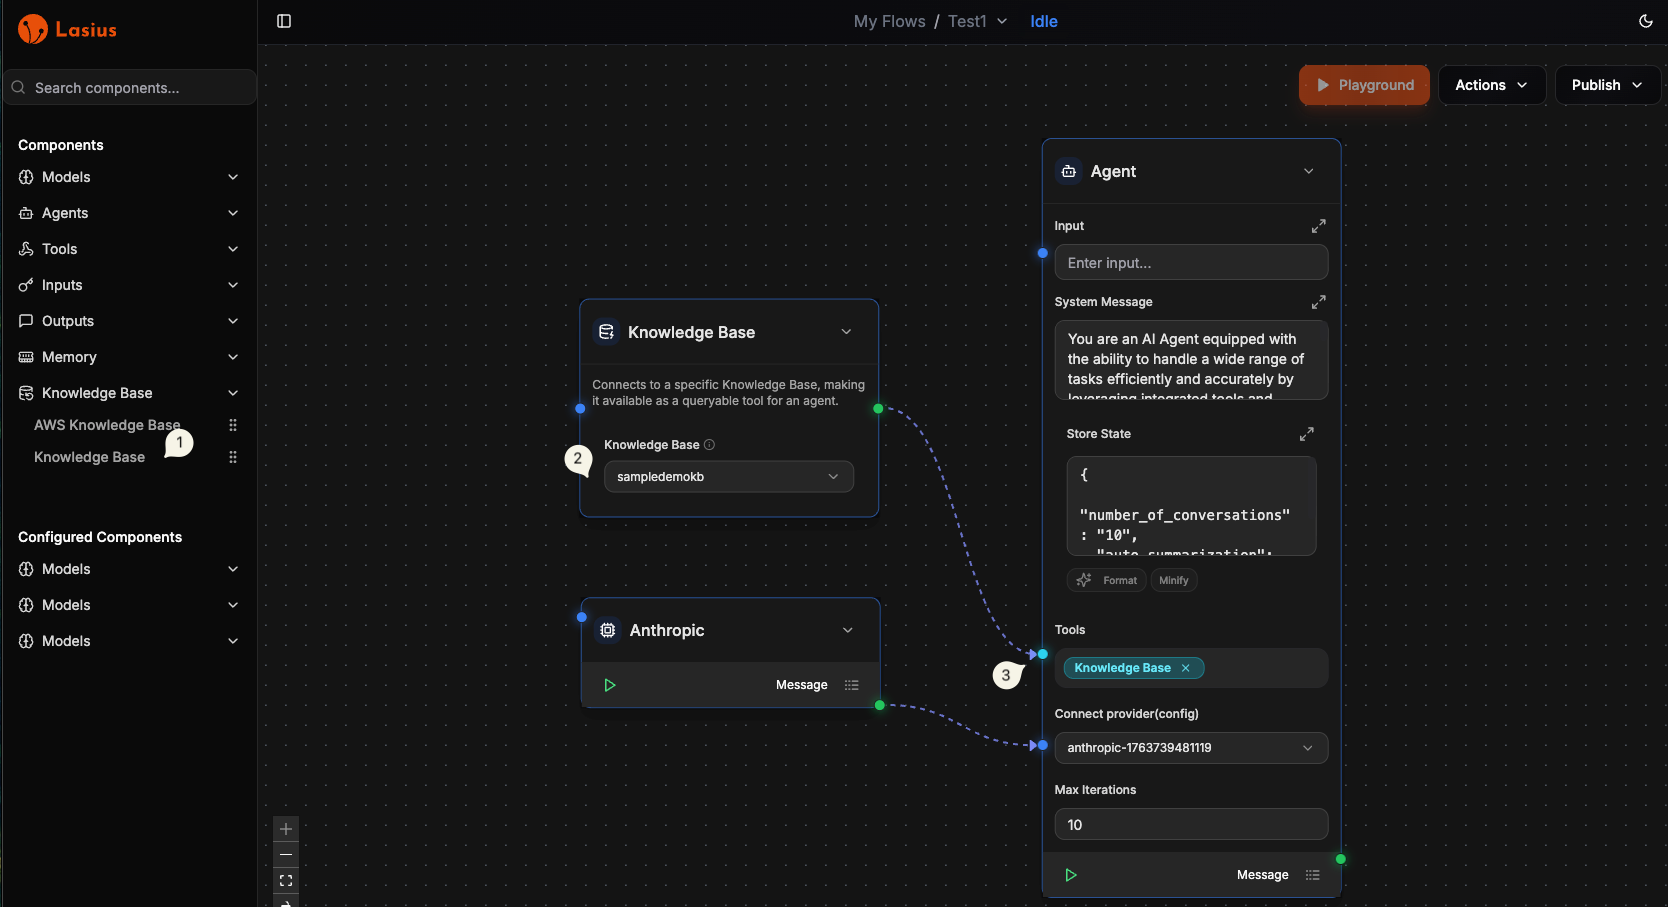 Fig : Knowledge Base inside workflow
How It Works
User Query → Agent → Knowledge Base Tool → Retrieve Documents → Generate Response
The agent automatically:
- Converts the query to a vector embedding
- Searches for similar document chunks
- Uses retrieved context to generate accurate responses
Best Practices
- Chunk size: Smaller chunks (500-1000 tokens) for precise retrieval
- Document quality: Clean, well-structured documents index better
- Naming: Use clear names to identify knowledge bases easily
- Updates: Re-upload documents when content changes
- Testing: Always test queries in Playground first
Troubleshooting
| Issue | Solution |
|---|---|
| "No results found" | Check if documents are in "Ready" status |
| "Irrelevant results" | Adjust similarity threshold or re-index |
| "Processing stuck" | Check file format and size limits |
Next: MCP Servers (Optional)