Model Provider
Set up AI model providers to power your workflow agents.
Before creating workflows, you need to configure at least one AI model provider. This creates a reusable configuration that can be shared across all your workflows.
Supported Providers
| Provider | Models | Use Case |
|---|---|---|
| OpenAI | GPT-4o, GPT-4, GPT-3.5 | General purpose, code generation |
| Anthropic | Claude 3.5 Sonnet, Claude 3 Opus | Complex reasoning, long context |
| Google Gemini | Gemini Pro, Gemini Ultra | Multimodal, fast responses |
| Amazon Bedrock | Claude, Llama, Titan | Enterprise, AWS integration |
| Ollama | Llama, Mistral, custom | Self-hosted, privacy-focused |
Navigate to Configurations
- Open the sidebar menu
- Click Configurations
- You'll see the Component Library page
Note:
The Component Library stores reusable configurations for models, tools, and other components.
Create a New Configuration
- Click the Create New tab
- Fill in the basic details:
| Field | Description |
|---|---|
| Name | Descriptive name (e.g., "OpenAI GPT-4o Production") |
| Description | Purpose of this configuration |
- Click Save to create the configuration shell
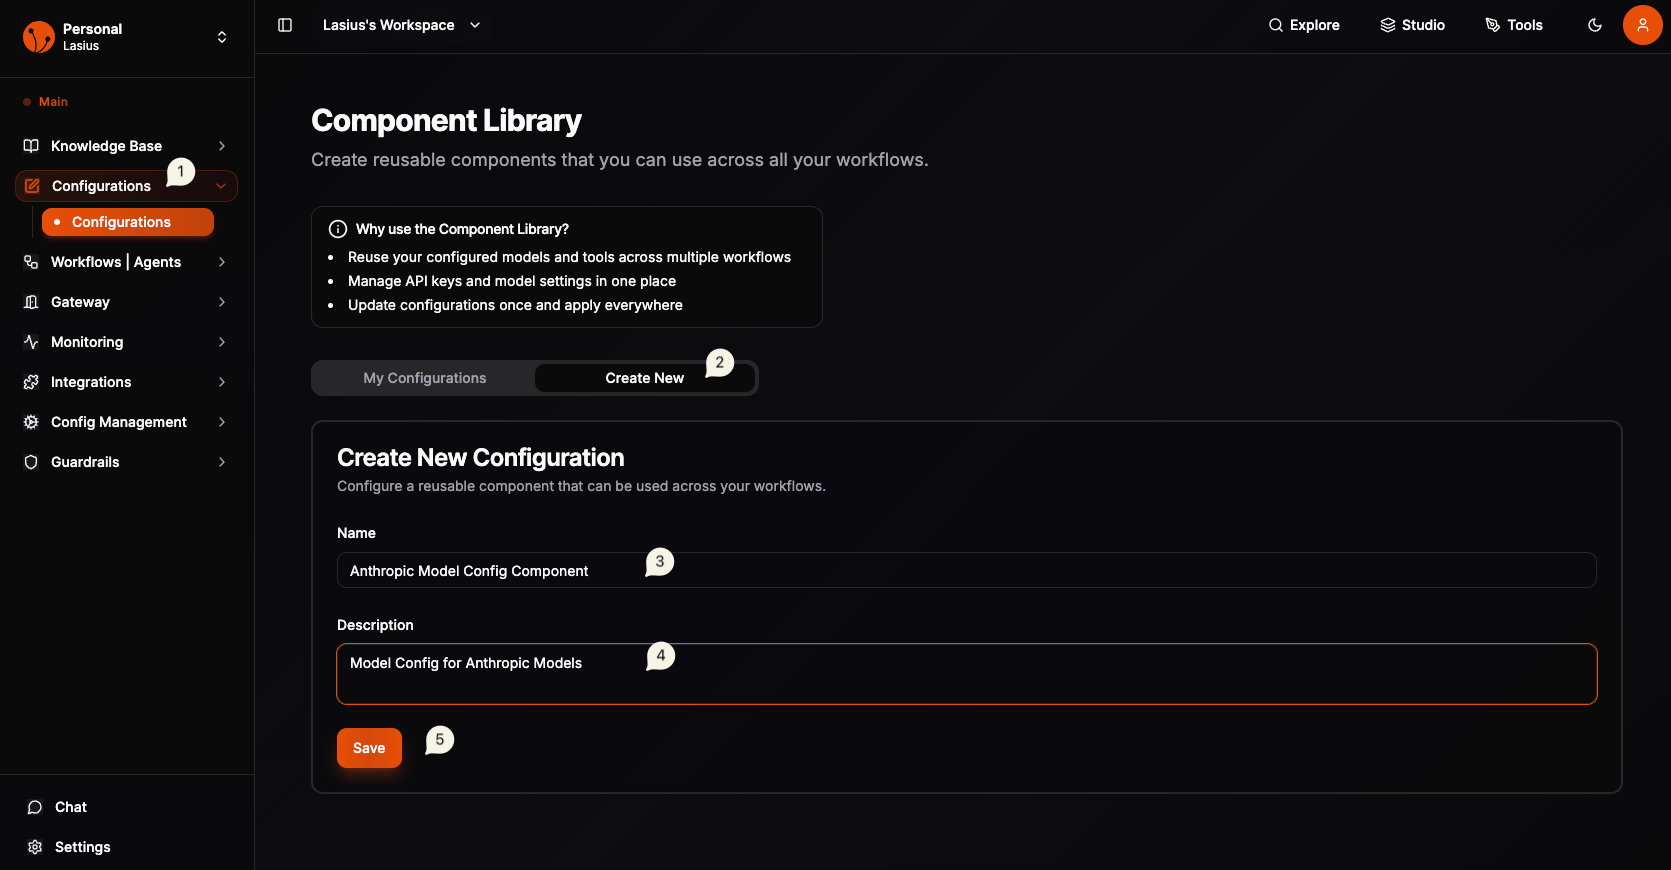 Fig : Model Configuration Component
Configure Provider Settings
After creating, click Edit Configuration to set up the provider:
Select Provider Tab
Choose your provider: OpenAI, Anthropic, Google Gemini, Amazon Bedrock, or Ollama
Provider Settings
| Setting | Description | Example |
|---|---|---|
| API Key | Your provider's API key | sk-... |
| Model Name | Select from dropdown | gpt-4o, claude-3-sonnet |
| Temperature | Response randomness (0-1) | 0.7 |
| System Message | Default instructions | "You are a helpful assistant" |
| Stream | Enable streaming responses | Toggle on/off |
Advanced Settings
| Setting | Description |
|---|---|
| Max Tokens | Maximum response length |
| Top P | Nucleus sampling parameter |
| Frequency Penalty | Reduce repetition |
| Presence Penalty | Encourage new topics |
Note:
Important: To use models from Configurable Components in workflows, you must have both Stream and Configure toggles enabled.
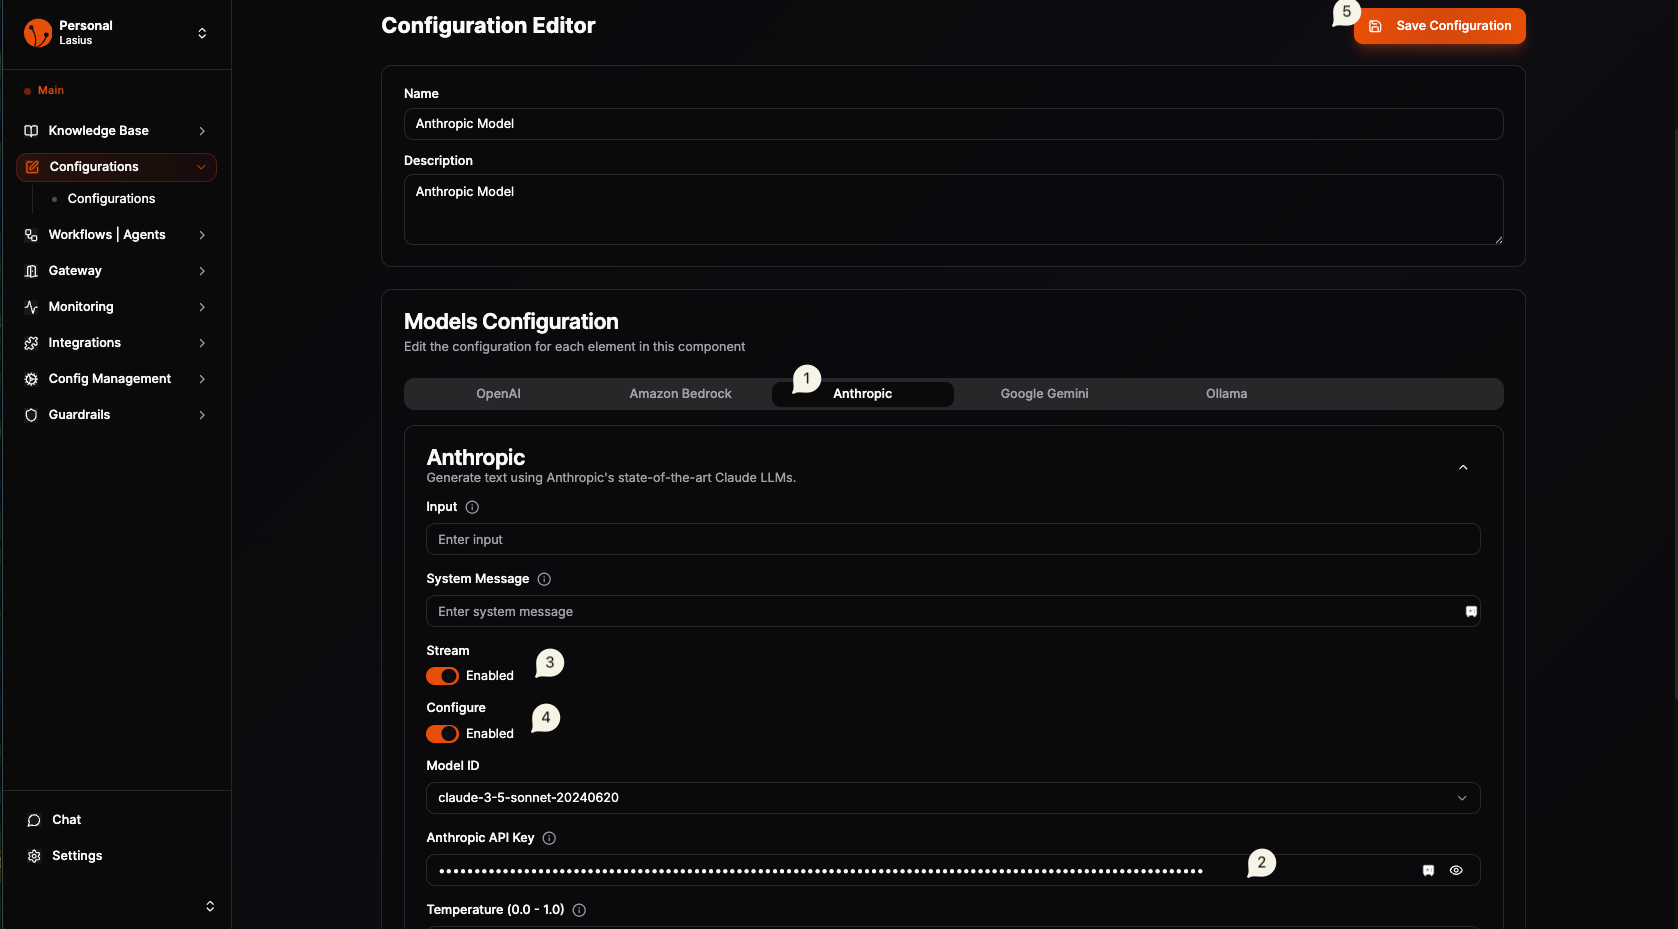 Fig : Model Provide Configuration ( API & Settings )
Using Your Configuration
Once saved, your model configuration appears in:
- Agent nodes in the workflow builder
- Component selection dropdowns
- My Configurations tab for management
In Workflow Builder
- Add an Agent node to your workflow
- In agent settings, you will see Connect Provider (config)
- From the Configured Components Identify the Configurable Model Provider Component with name (configured must be toggled on in the component)
- Drag the Actual model to canvas/editor
- Now connect the output of Model Node ( 🟢 ) to Connect Provider in Agent Node (🔵)
- Once Connected you will see an animated dotted line.
- Yay, you have added LLM model to your agent
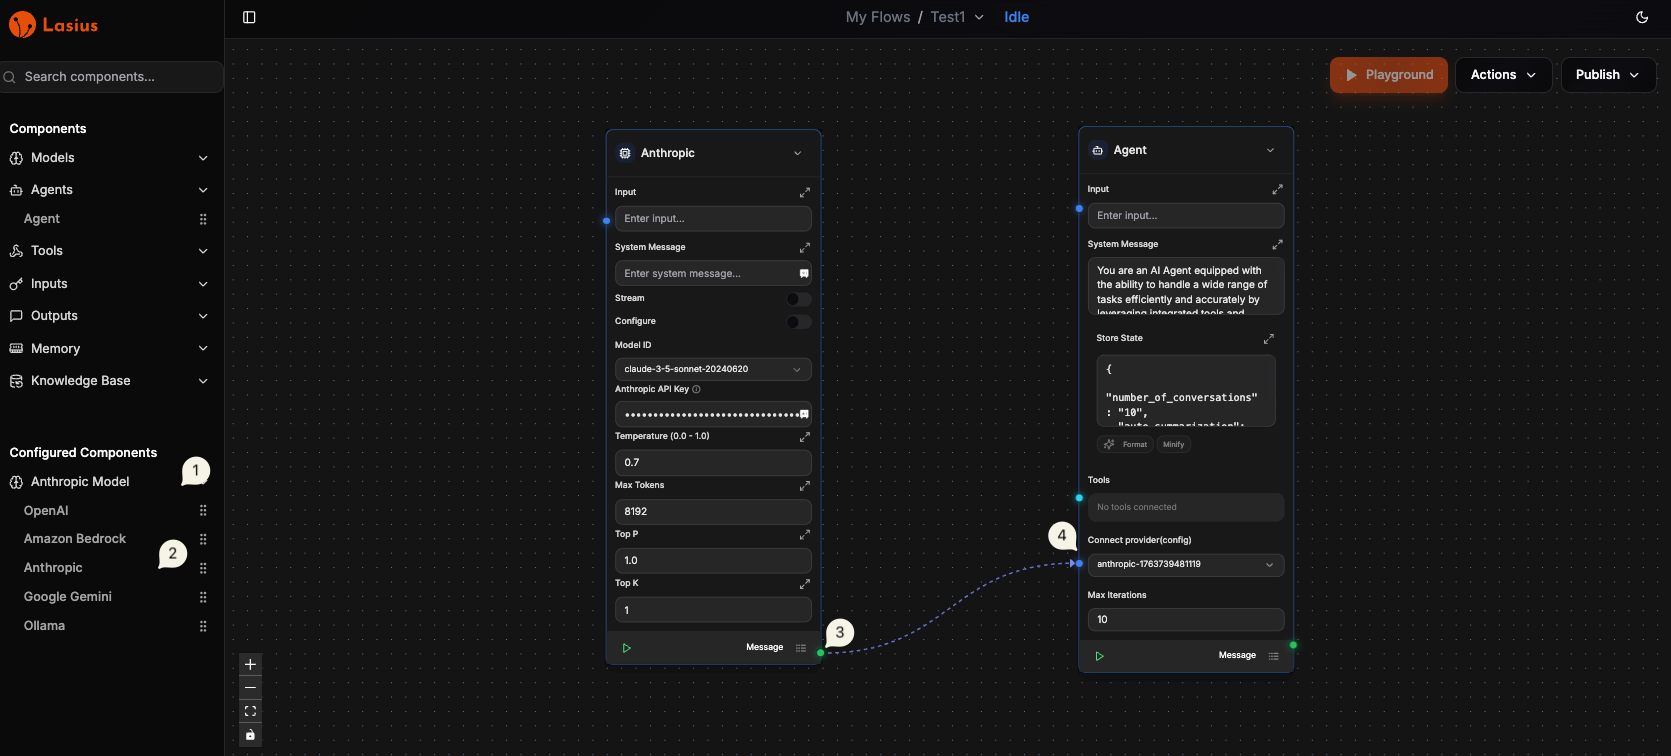 Fig : Configurable Model Provider with Agent
Best Practices
- Naming convention: Include provider, model, and environment (e.g., "Anthropic Claude-3 Dev")
- Separate configs: Create different configs for dev/staging/production
- Temperature tuning: Use lower values (0-0.3) for factual tasks, higher (0.7-1) for creative
- API key security: Keys are encrypted; never share configurations publicly
Troubleshooting
| Issue | Solution |
|---|---|
| "Invalid API key" | Verify key is correct and has proper permissions |
| "Model not available" | Check your provider plan supports the selected model |
| "Rate limit exceeded" | Upgrade plan or add request throttling |
Next: Workflow